Editing allocations already set up
You will only be able to edit the allocation of students that haven‘t yet been marked. There are two different ways to edit the allocations:
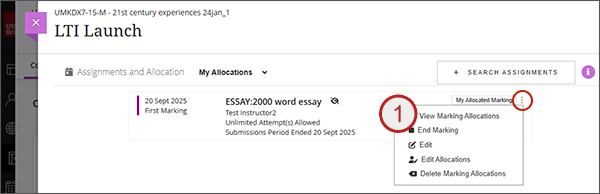
Via View Marking Allocations
- To the right of the assignment, from the ellipses select View Marking Allocations
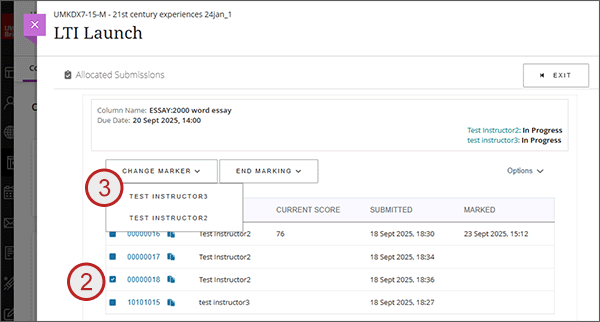
- Select the tick box to the left of the student(s) that you want to change the allocation for.
- From the Change Marker drop down, select the marker you want to change the allocation to.
- You will get a message asking you to confirm. Select OK to continue with the allocation change.
- The list will update with the new allocated marker.
Via Edit Allocations
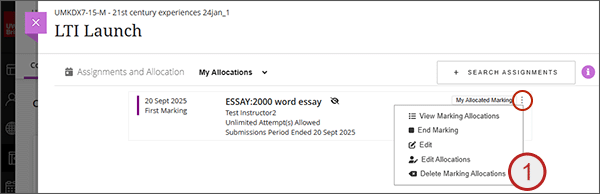
- To the right of the assignment, from the ellipses select Edit Allocations
- Use the drop down to the right of the student to select a different marker.
- Alternatively, choose the marker from Select Marker and tick the students you want to reallocate.
- Select Start Marking and the allocation changes will be applied.

Deleting allocations
Deleting allocations will not delete any marking already saved or any student submissions. It will simply clear the allocations made and allow you to start the allocation process again. Subsequently re-allocating will only list any students that haven‘t yet been marked.
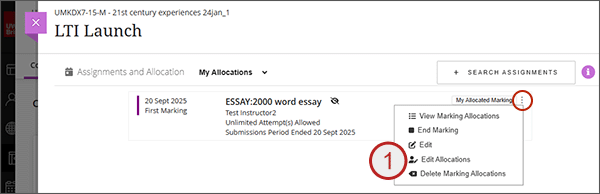
- To the right of the assignment, from the ellipses select Delete Marking Allocations
- You will get a message asking you to confirm. Select OK to continue with the deletion of allocation.
- The assignment will be set back to Ready to Mark.