From Books & Tools, select Marking Allocation and the tool will load.
There are various filters to use depending on your role:
Recently Due: assignments that have ended in the last 4 weeks
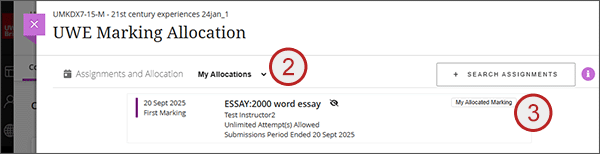
My Allocations: assignments that you have allocations for
Ready to Mark: assignments that are no longer in the submission window but they have not yet been allocated
In Progress: assignments which have already been allocated
If you are looking for marking allocated to you, use the My Allocations filter.
Select the My allocated Marking button to the right of the assignment name.
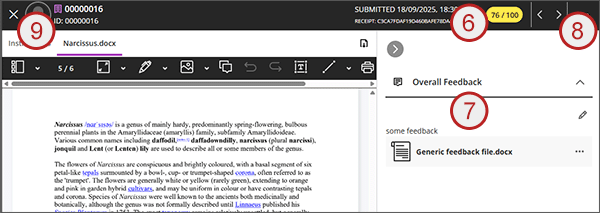
You will see a table with your list of allocated students. It will show either the student name or student ID; the current score; the date the student submitted; and a timestamp for any marking done.
Click on a student and you will be taken into the students latest attempt in the Gradebook.
Enter your mark in the pill at the top.
Expand the right hand panel and enter your feedback making sure to select Save. Alternatively use the in-line Annotate function.
To navigate to the next student allocated to you, use the forward and backward arrows in the top right.
To return to your list of allocations, use the left hand X.
You can Exit the allocation list and return to it again at any point.
When your marking is complete, tick the I have completed my marking for this assessment box but also let the module leader know.