Installing Panopto on a UWE PC
Panopto can be downloaded via the Software Center to an individual PC. This is useful for users who wish to record screen demonstrations from their desk.
Quick steps to install Panopto onto a UWE PC
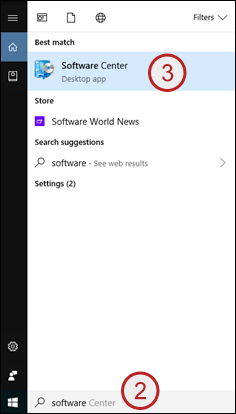
- Click into Windows search box
- Within the Search box type Software Center
The Software Center will appear as a search result - Click Software Center
- Tick the Panopto option
- Click Install
- Panopto will now be installed to your PC and an icon will appear on your desktop
The Software Center will appear
Installing Panopto on a non UWE PC
Panopto can be downloaded via the Panopto cloud to a non UWE PC. This is useful for users who wish to record screen demonstrations from their home desktop.
Quick steps to install Panopto onto a non UWE PC
- Access the Panopto cloud via https://uwe.cloud.panopto.eu
- Click Sign in
- Enter your UWE username and Password (if not already logged into Blackboard). The Panopto cloud will open
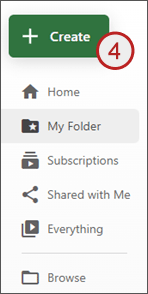
- Click Create
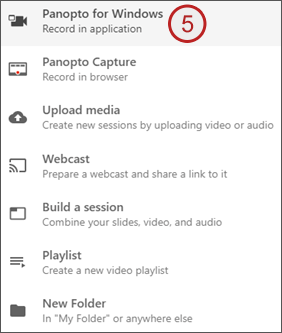
- Click Panopto for Windows
- Click the appropriate download option
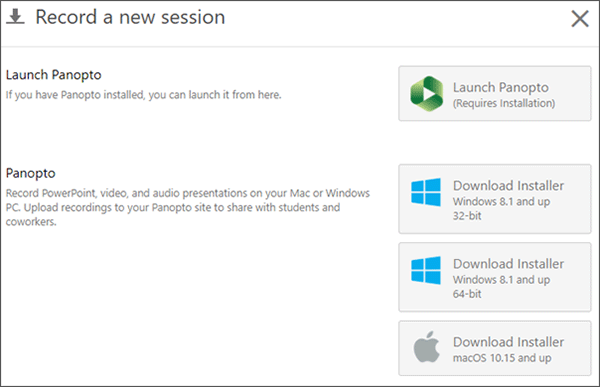
- Complete the download process in the way that is appropriate to the browser you have used (click run in Internet Explorer and Edge, open the exe file in Google Chrome, Choose Save file in firefox)
- Panopto will now be installed to your PC and an icon will appear on your desktop
Note: If you are unable to use the Panopto desktop recorder you may be able to record using Panoptos Browser recorder Panopto Capture
Note: If you are unable to download the Panopto recorder, use Panopto Capture or apps anywhere, you may need to update your operating system
Making a desktop recording
Once Panopto has been installed on your desktop a recording can be made by opening Panopto by double clicking the desktop icon.
For guidance on making recordings please see the Make a manual recording page using the desktop recorder.