Creating a zipped package for uploading back into Blackboard

Once you have added all your marks to the marking spreadsheet and created any feedback files, you need to collate them into a zipped package.

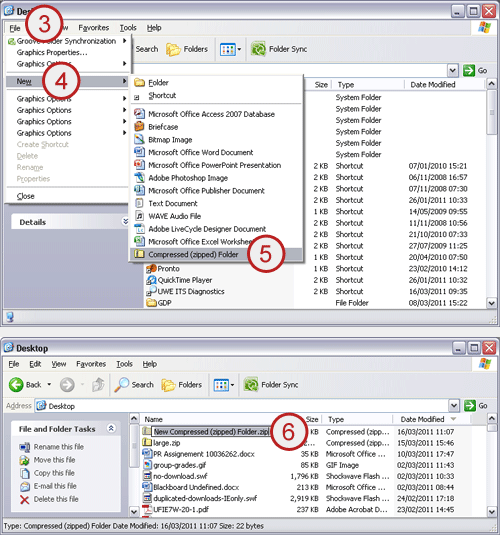
QUICK STEPS: Creating a zipped package

  1. From your PC’s Desktop, select My Computer.
  2. Navigate to the location on your PC where you want to create the zipped package.
  3. Select File.
  4. Select New.
  5. Select Compressed (zipped) folder.
  6. A new zipped package will be listed for you to rename.

example screenshot showing quick steps 3 to 6 above

You can now add your marking spreadsheet and feedback files into the new zipped package.

QUICK STEPS: Adding the spreadsheet and feedback files into the zipped package

  1. From your PC’s Desktop, select My Computer.
  2. Navigate to the location on your PC of the extracted files.
  3. Select the marking spreadsheet and all of your feedback files (hold the Ctrl key down to select multiple files), then right click and select Copy.
  4. Navigate to the newly created zipped package - in the screenshot example the zipped package has been renamed to agreed-marks.zip.
  5. Right click on the zipped package and select Paste.
  6. The only items that should be in the zipped package are the marking spreadsheet and any feedback files. There should be no folders.

example screenshot showing quick steps 3 to 6 above

Back to top