Staff that have been given an exemption from reading assignments on screen and so wish to bulk print student assignments can do so as follows. Please note that Windows prevents you from printing more than 15 files at a time.
In this example, we are bulk printing Microsoft Word files, but please remember that your students may not all submit in Word format and so you may need to check the various file types submitted when printing. Please note that student submissions are always in the format student_number_x_xxx, eg 12345678_1.doc, 12345678_2.pdf, etc .
Step 1 - download the marking package
Download a marking package of the students whose assignments you want to print. This can be downloaded either through the Marks and Feedback tool or the Marking tool. Select the tool that the Module Leader has specified for use in marking. If in doubt, please consult the Module Leader.
Step 2 - extract the files
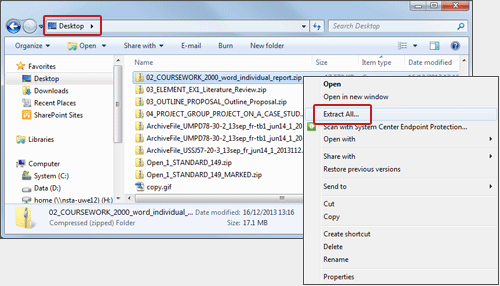
Navigate to where you saved the package, right-click on it and select Extract All:
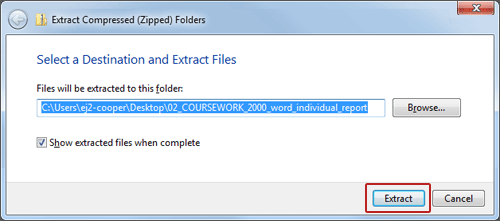
Windows will prompt you to pick a location to save the extracted files. The default location is the same as where you saved the marking package. If you want to save the files to another location, select Browse and select a new location. Select Extract to continue:
Step 3 - organise the files to print
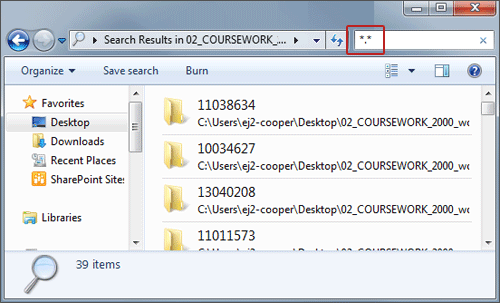
Once extracted, the files will be listed, as below. To show all files in the marking package, ie to simplify printing, enter *.* in the search bar in the top right of the screen:
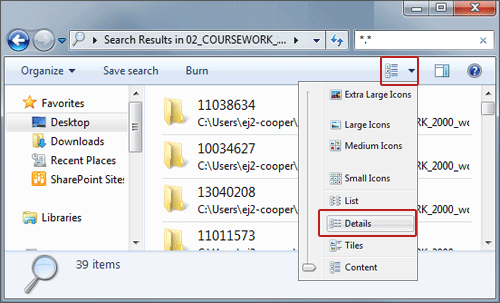
Select the Change your View: more options arrow ![]() and then select Details:
and then select Details:
Step 4 - select the files to print
Select the Type column header to order the search results by file type. Scroll down until you see the students assignment files (these will be named student_number_x_.xxx, eg 12038073_1_1.docx:
Select the uppermost file, then hold down Ctrl+Shift on your keyboard and select another file lower down the list. This will select all files in between. Check that the number of items does not exceed 15 (this is the maximum number of files Windows allows you to print at a time). If you have selected more than 15 files, hold down Ctrl on its own and then (de)select files until the number of items selected shows 15 or under:

Finally, right click on any of the files selected and select Print. Your files will be sent to the default printer for your computer.